Self-hosting Mattermost on AWS Lightsail

If you haven't heard of Mattermost, it's an open source communications platform similar to Slack. It has a gorgeous UI:
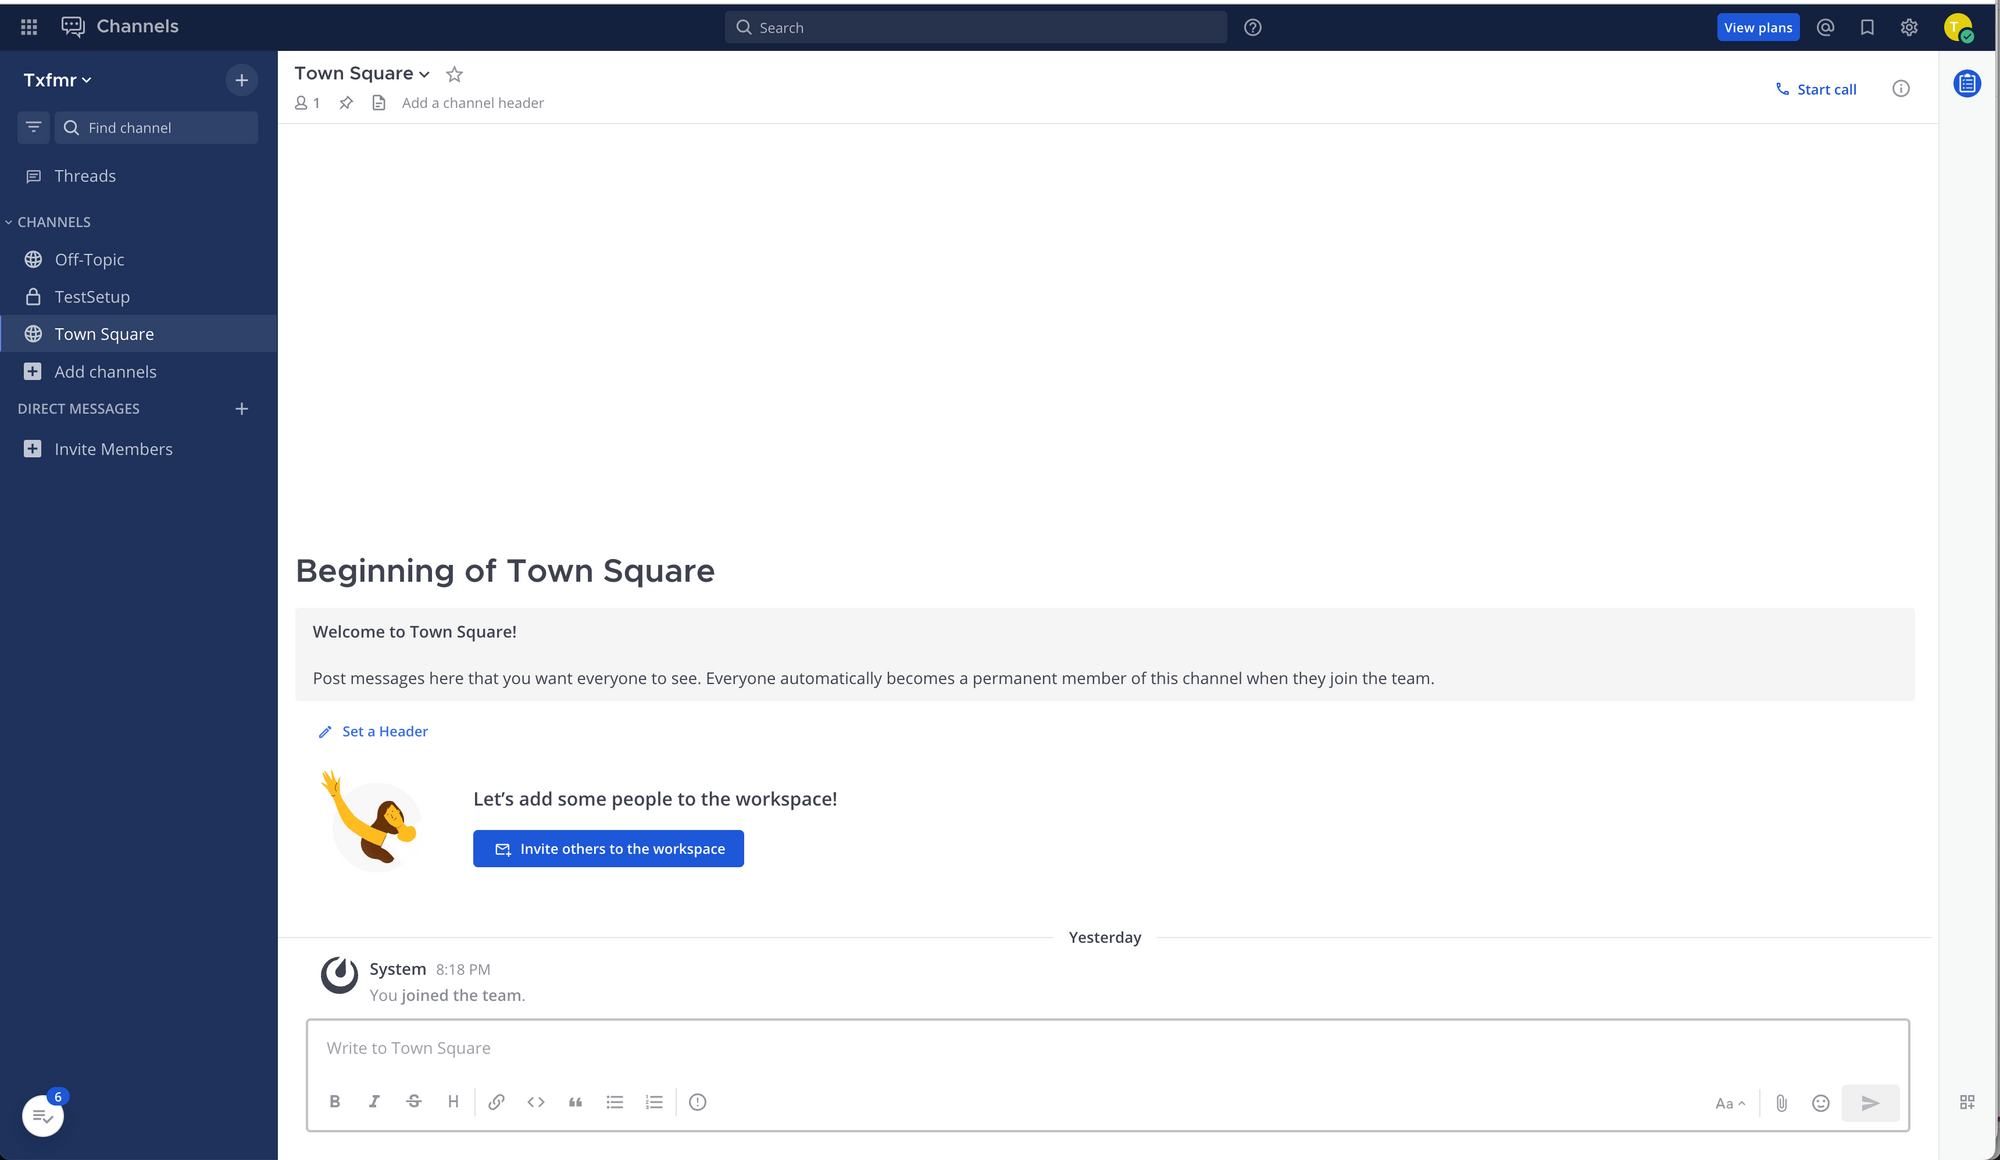
and it also comes with native mobile apps that can connect to self-hosted versions.
Unlike the free version of Slack, there are no limitations on how long messages will be available for browsing and searching. Since Slack can end up being a powerful knowledge base, this is a pretty major limitation.
Overall installing it on AWS Lightsail wasn't too bad, but I ran into a few minor snags while setting it up, so I thought I would document it.
Creating a LightSail Instance
Specs:
- Hardware: 2 GB RAM, 2 vCPUs, 60 GB SSD
- OS: Ubuntu 22
Attach a static IP to the instance and associate it with a domain name, for example chat.your.io
Creating a LightSail Postgres DB
- Hardware: 1 GB RAM, 2 vCPUs, 40 GB SSD
- Version: PostgreSQL database (15.4)
Installing Mattermost
- First setup the database using the official docs
- Note #1 - connect via
psql -h your.rds.amazonaws.com -p 5432 -U dbmasteruser -d postgresand use the password from the Lightsail postgres UI. - Note #2 - when using LightSail, there is one divergence from the official instructions where you must set the
sslmode=requireas documented on this github issue.
- Note #1 - connect via
- Install Mattermost based on the official docs.
At this point, if you go to your public ip on port 8065 you should see the mattermost welcome page:
Adding DNS
While not technically needed for a non-SSL enabled Mattermost installation, creating a DNS entry is required for SSL. It also makes the nginx configuration simpler.
See Creating a DNS zone to manage your domain’s DNS records in Lightsail for details on how to set that up.
Setting up NGINX without SSL
First lets setup nginx without SSL and verify our installation, then we'll add SSL support in a later step.
Install nginx via:
sudo apt update
sudo apt install nginx
and create a config file in /etc/nginx/sites-available/chat.your.io and symlink it to /etc/nginx/sites-enabled/chat.your.io to activate it.
map $http_upgrade $connection_upgrade {
    default upgrade;
    '' close;
}

server {
    listen 80;
    server_name chat.your.io;

    location / {
        proxy_pass http://localhost:8065;
        proxy_set_header Host $host;
        proxy_set_header X-Real-IP $remote_addr;
	proxy_set_header X-Forwarded-For $proxy_add_x_forwarded_for;
	proxy_http_version 1.1;
        proxy_set_header Upgrade $http_upgrade;
        proxy_set_header Connection $connection_upgrade;
    }
}
Restart nginx by running systemctl restart nginx
This includes some special headers for upgrading websocket connections, which is used by mattermost.
Now you should be able to go to http://chat.your.io and view your mattermost welcome page (shown above).
Update the SiteURL in /opt/mattermost/config/config.json to match your current URL
{
    "ServiceSettings": {
        "SiteURL": "http://chat.your.io",
        ..
    ..
}
and restart mattermost with sudo systemctl restart mattermost
Warning: At this point, I was no longer able to login with the user I created earlier via the mattermost web UI. I ended up using psql to connect to the mattermost database as the admin user, then dropping and recreating the database. YMMV.
Connecting from the Mattermost Web App
At this point, you should be able to connect to your mattermost installation via http and see a UI like the screenshot at the top of this blog post.
Enabling Email notifications
Without email notifications, there's no way to invite a user to the server that I could find, other than manually creating the user via the mattermost cli app on the server. Without Email notifications enabled, you'll also see a "server preview" warning banner on the top of the UI.
To enable email notifications, update the following setting in your config:
"SendEmailNotifications": true,and restart mattermost with sudo systemctl restart mattermost
Setting up SMTP: attempt 1 with Postfix
In order to invite users to the server, you need email notifications working.
Using these instructions with Postfix:
sudo apt install postfixWhen it prompts for a domain name, enter chat.your.io
Update mattermost config file /opt/mattermost/config/config.json to:
"SMTPPort": "25",And restart with sudo systemctl restart mattermost
Now try to test the SMTP connection using the Test Connection button in the SMTP settings
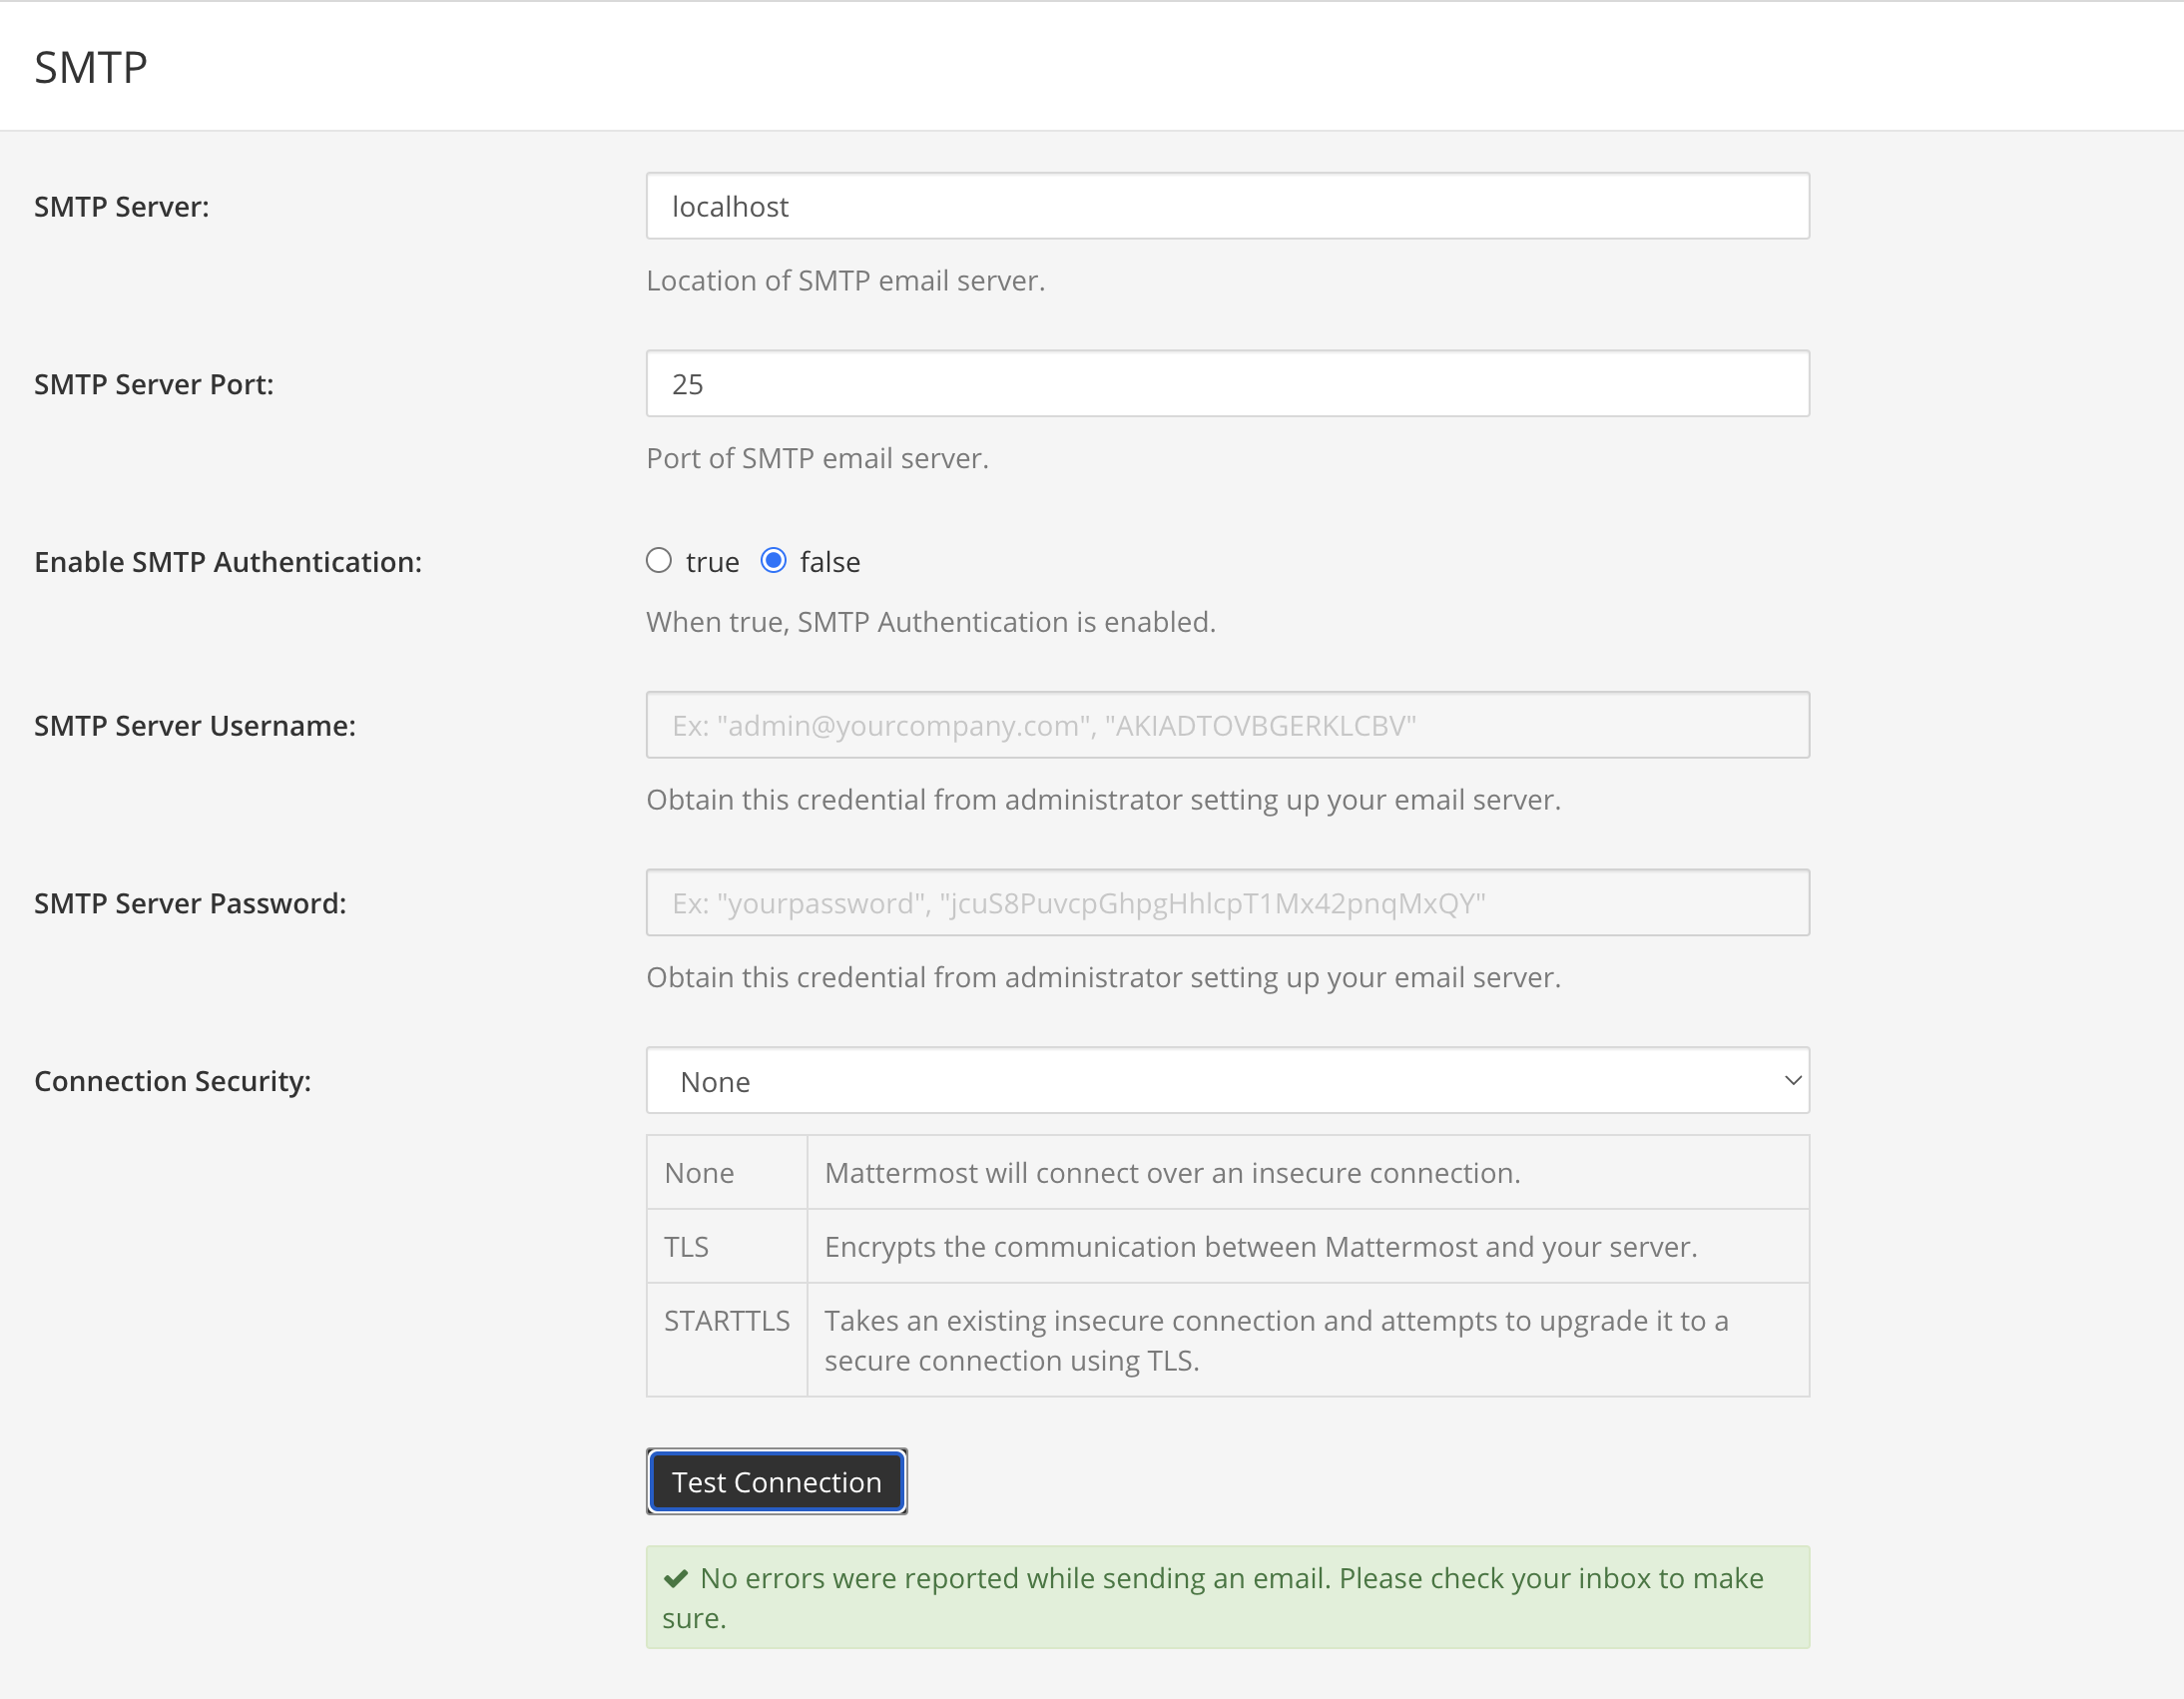
Unfortunately, when I tried to send myself email to my gmail address, I got an error:
D955C7F14D    23274 Fri Nov  3 22:33:38  MAILER-DAEMON
(connect to alt2.gmail-smtp-in.l.google.com[172.253.62.27]:25: Connection timed out)
                                         email@gmail.com
This appears to be because AWS EC2 restricts this by default, but filing a ticket to AWS support should allow them to enable this.
Setting up SMTP: attempt 2 with AWS SES
I decided to use SES instead, since it's a managed service with a low price point.
Follow the instructions here to setup SES with Mattermost.
You will also need to set your ReplyToAddress field in the config, otherwise the Test Connection will throw an error. That can be done in the mattermost system console under the /admin_console/environment/notifications URL or in the config file.
To get out of "sandbox mode" which only allows sending to verified email addresses that you own, AWS SES requires you to manually send a request describing your use case to their support.
Setting up SSL
See my other blog post for the basic steps of setting up nginx with SSL. The full nginx config I ended up using is in this github gist.
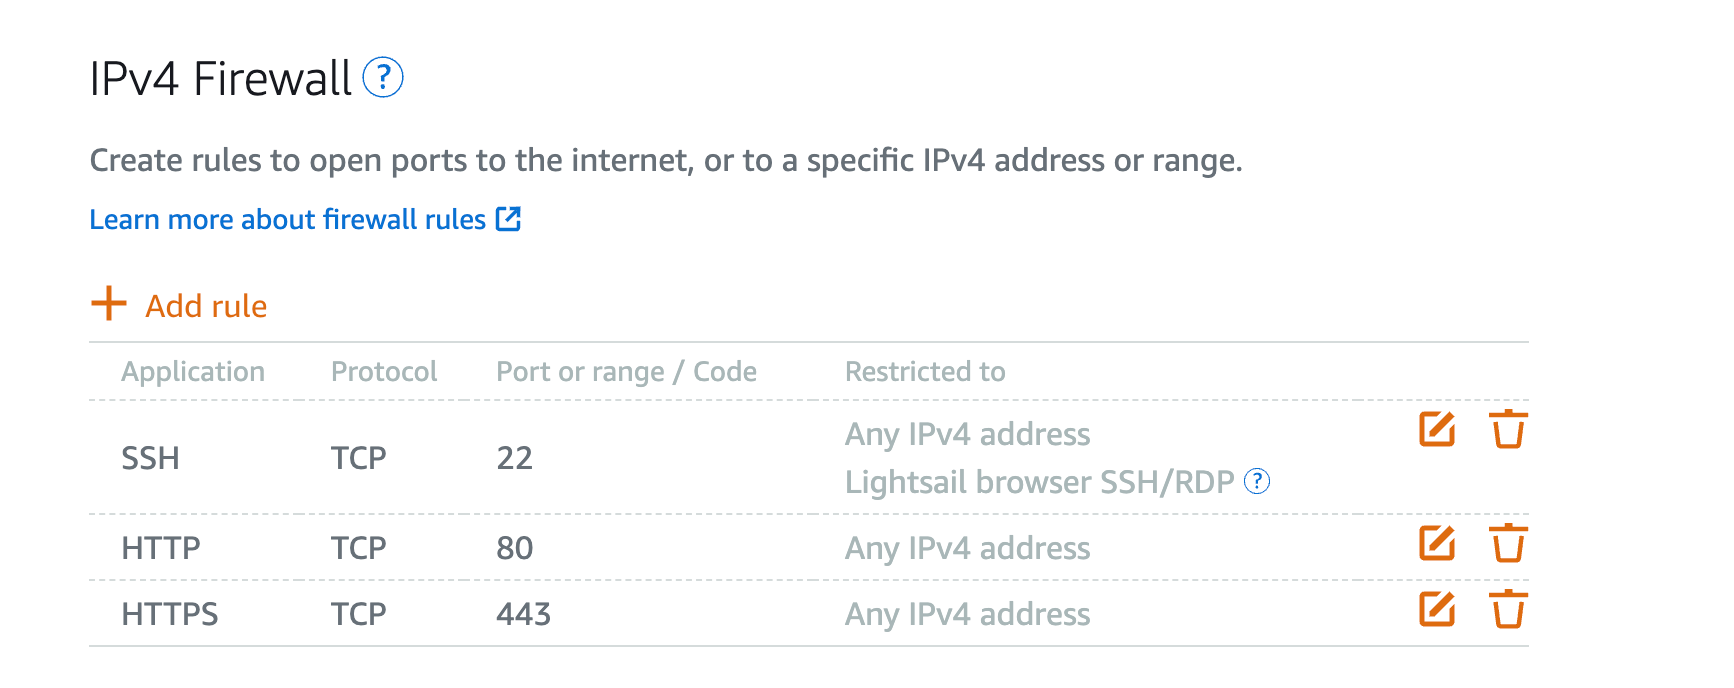
In addition you will have to update the firewall settings. In the Lightsail networking tab, add port 443, otherwise all traffic will be blocked by the firewall:
Visit https://chat.your.io in your browser to verify it's working
Fixing connection errors
If you get the following error banner even when your computer is connected to the internet:

Error: Please check connection, Mattermost unreachable. If issue persists, ask administrator to check WebSocket port
You are probably hitting this issue. To fix it, set AllowCorsFrom to "*” in mattermost/config/config.json.
Note that on the iOS app the error message will be slightly different.
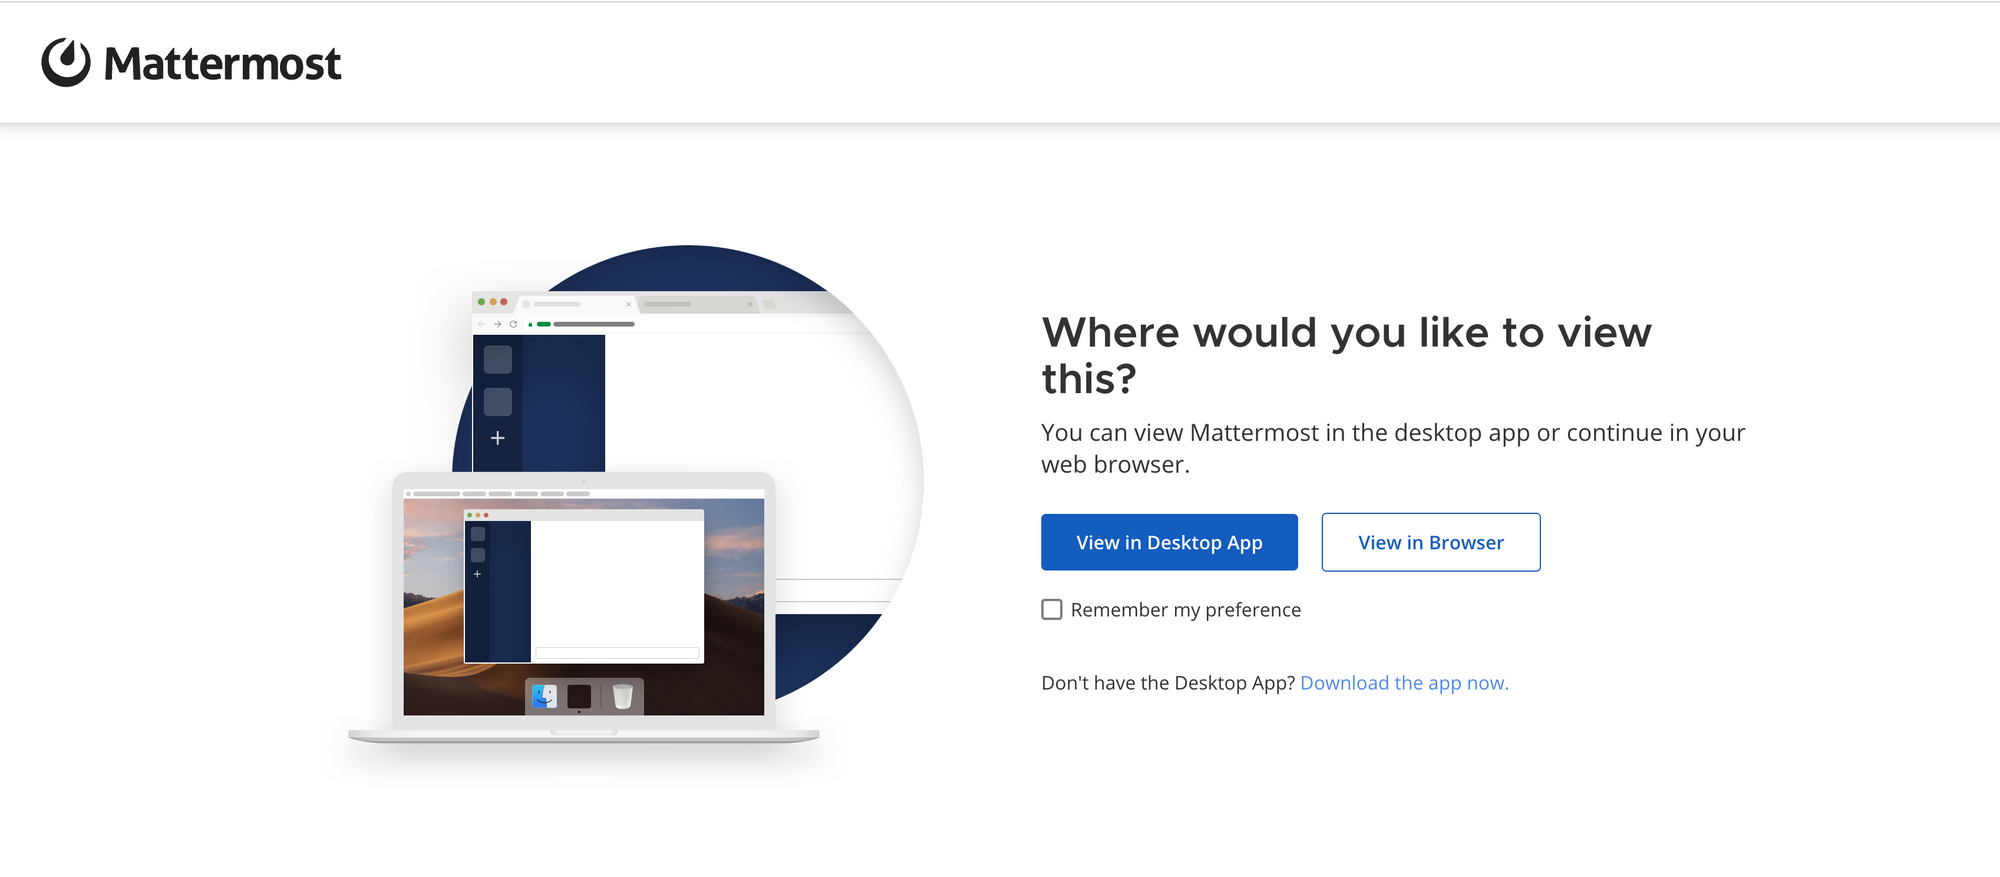
Connecting from the Mattermost Desktop and iOS Apps
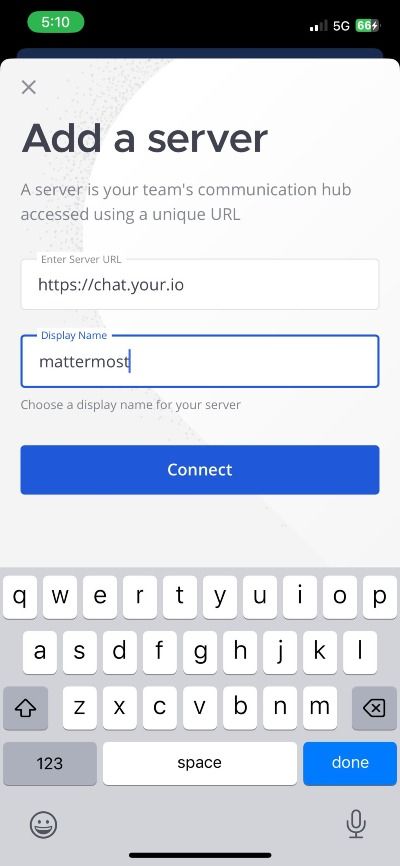
Download the iOS or desktop apps and enter https://chat.your.io for your server URL.
Enabling iOS push notifications
Your system console settings should already look like this:
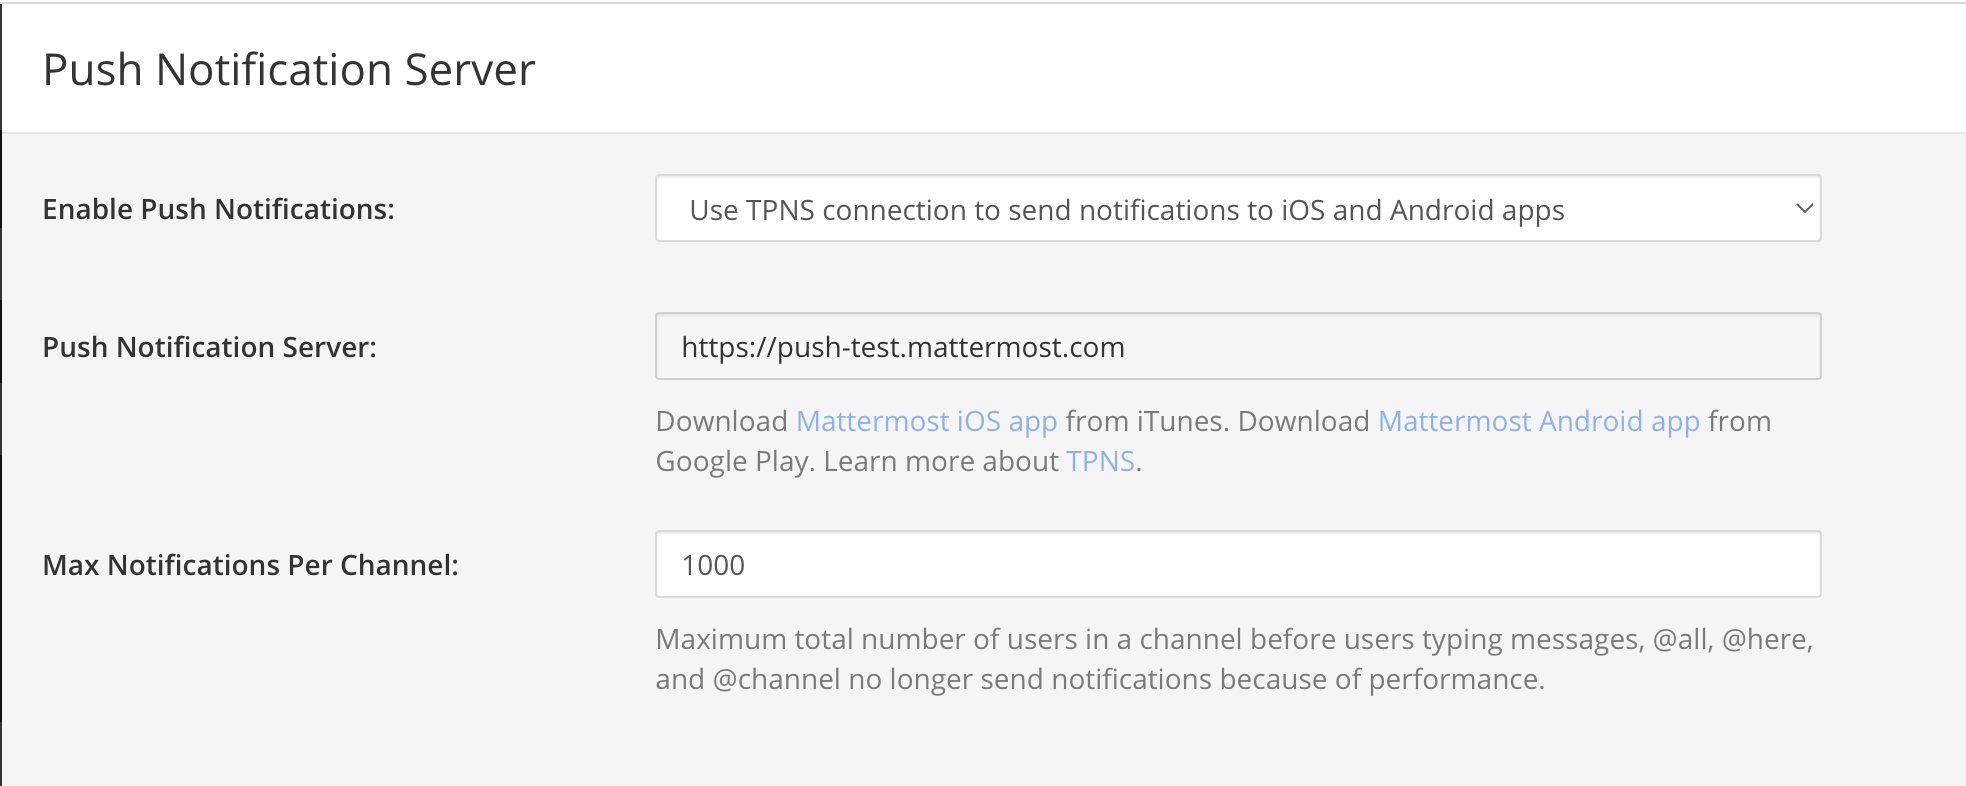
Which enables push notifications via a server generously maintained by the Mattermost project founders.
To test push notifications, temporarily set your notifications for all activity and any online/offline state for the user logged into the iOS app:
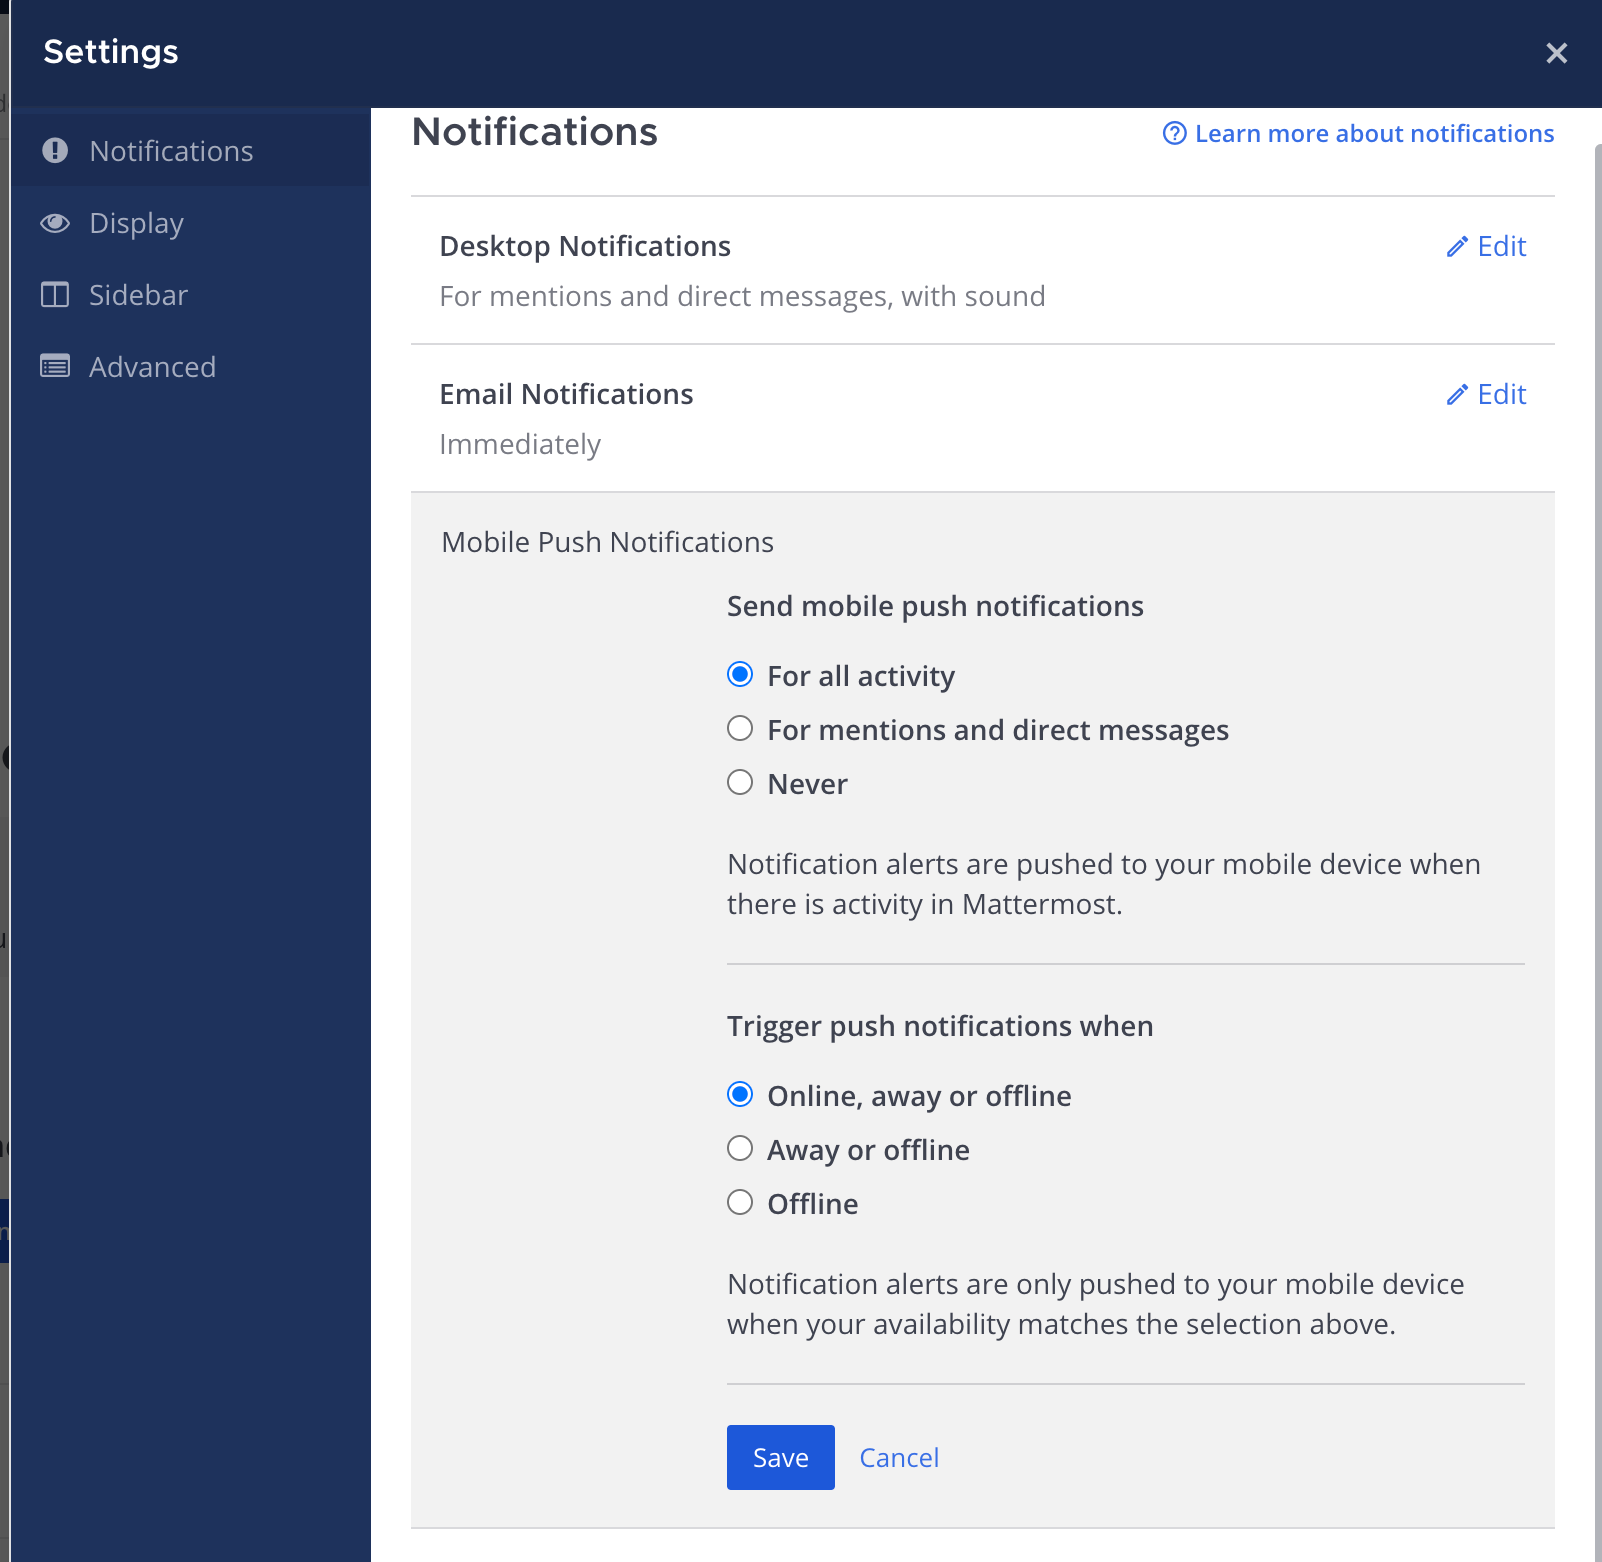
And then create a second user and write a post to a shared channel like Town Square. You should receive a notification on your device.
Note that the Test Push Notification Service is not recommended for production, but there are alternatives listed on this documentation page.
Conclusion
This blog post went through the steps to get a self-hosted Mattermost instance fully setup on AWS Lightsail with support for
- SSL
- Websocket
- iOS app
- iOS app push notifications
If you run into any issues, reply to this twitter thread and I'll try to help!