AWSim + autoware running on Ubuntu 20.04

My first attempt to run AWSim (autoware simulator) from inside a docker container didn't go so well:
$ ./AWSIM.x86_64  --help
Found path: /../AWSIM/AWSIM.x86_64
Segmentation fault (core dumped)
Here's a walkthrough of how I worked around it.
Retry on host
I initially attempted the command inside of the autoware container, since I'm currently using the autoware docker installation.
I decided to retry on the host, outside of the docker container, and it worked!
Options
- Fix the issue which prevents AWSim from working inside the container. Currently blocked, but I created an autoware discussion to see if other folks have managed to get AWSim + docker working.
- Run autoware directly on the host using the source install approach.
- Keep autoware inside the container, run AWSim on the host and allow them to communicate. This seems like it should be possible as long as they can share the network, though I'm not exactly sure how AWSim communicates with autoware over ros2.
Option 2: Run autoware directly on the host
I went ahead and installed autoware directly on the host, see this blog post for details:
 Traun Leyden
Persisting the settings changes
The AWSim docs recommend adding this to ~/.bashrc:
if [ ! -e /tmp/cycloneDDS_configured ]; then
    sudo sysctl -w net.core.rmem_max=2147483647
    sudo ip link set lo multicast on
    touch /tmp/cycloneDDS_configured
fi
However then you get prompted with an annoying sudo password after you ssh to your machine.
Loopback device multicast
To persist the changes to set the loopback interface (lo) to use multicast, I updated my /etc/network/interfaces file from:
auto lo
iface lo inet loopback
to:
auto lo
iface lo inet loopback
      post-up ip link set lo multicast on
and ran sudo ifdown -a && sudo ifup -a to pickup the changes, which should also be picked up on every startup. Now ip link shows the loopback device as using multicast:
# ip link
1: lo: <LOOPBACK,MULTICAST,UP,LOWER_UP> mtu 65536 qdisc noqueue state UNKNOWN mode DEFAULT group default qlen 1000
    link/loopback 00:00:00:00:00:00 brd 00:00:00:00:00:00
These settings will last across a reboot.
Set net.core.rmem_max setting
Edit /etc/sysctl.conf as root and add this line:
net.core.rmem_max=2147483647and reload the settings with:
# sysctl -p
net.core.rmem_max = 2147483647
Verify the settings with:
# sysctl -a | grep -i "net.core.rmem_max"
net.core.rmem_max = 2147483647
These settings will last across a reboot.
Download map files
The AWSim demo comes with a map of nishishinjuku_autoware_map, and so autoware will need to be launched with the same map in order to work.
$ wget https://github.com/tier4/AWSIM/releases/download/v1.0.0/nishishinjuku_autoware_map.zip
$ unzip nishishinjuku_autoware_map.zip
Launch AWSim
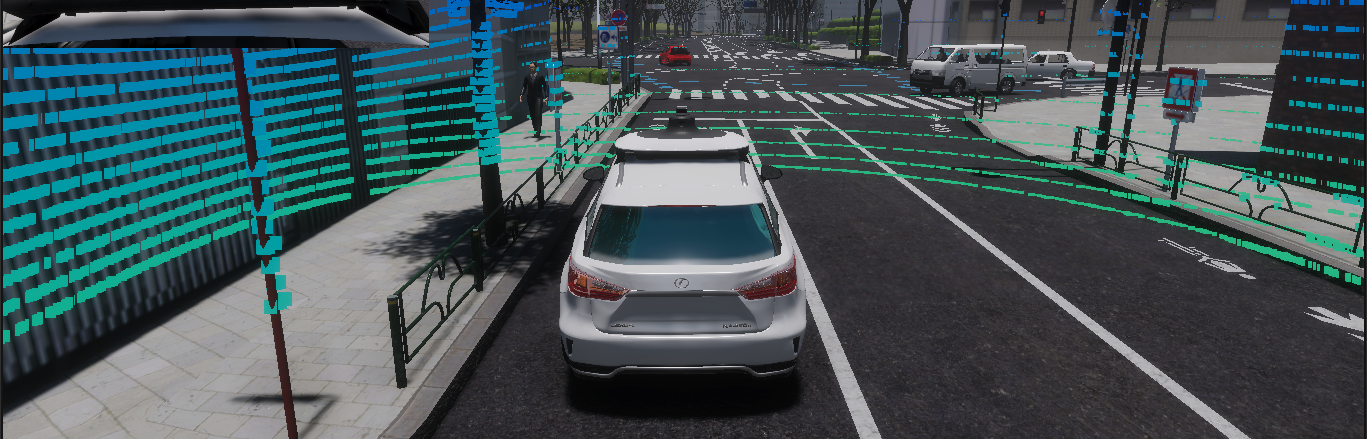
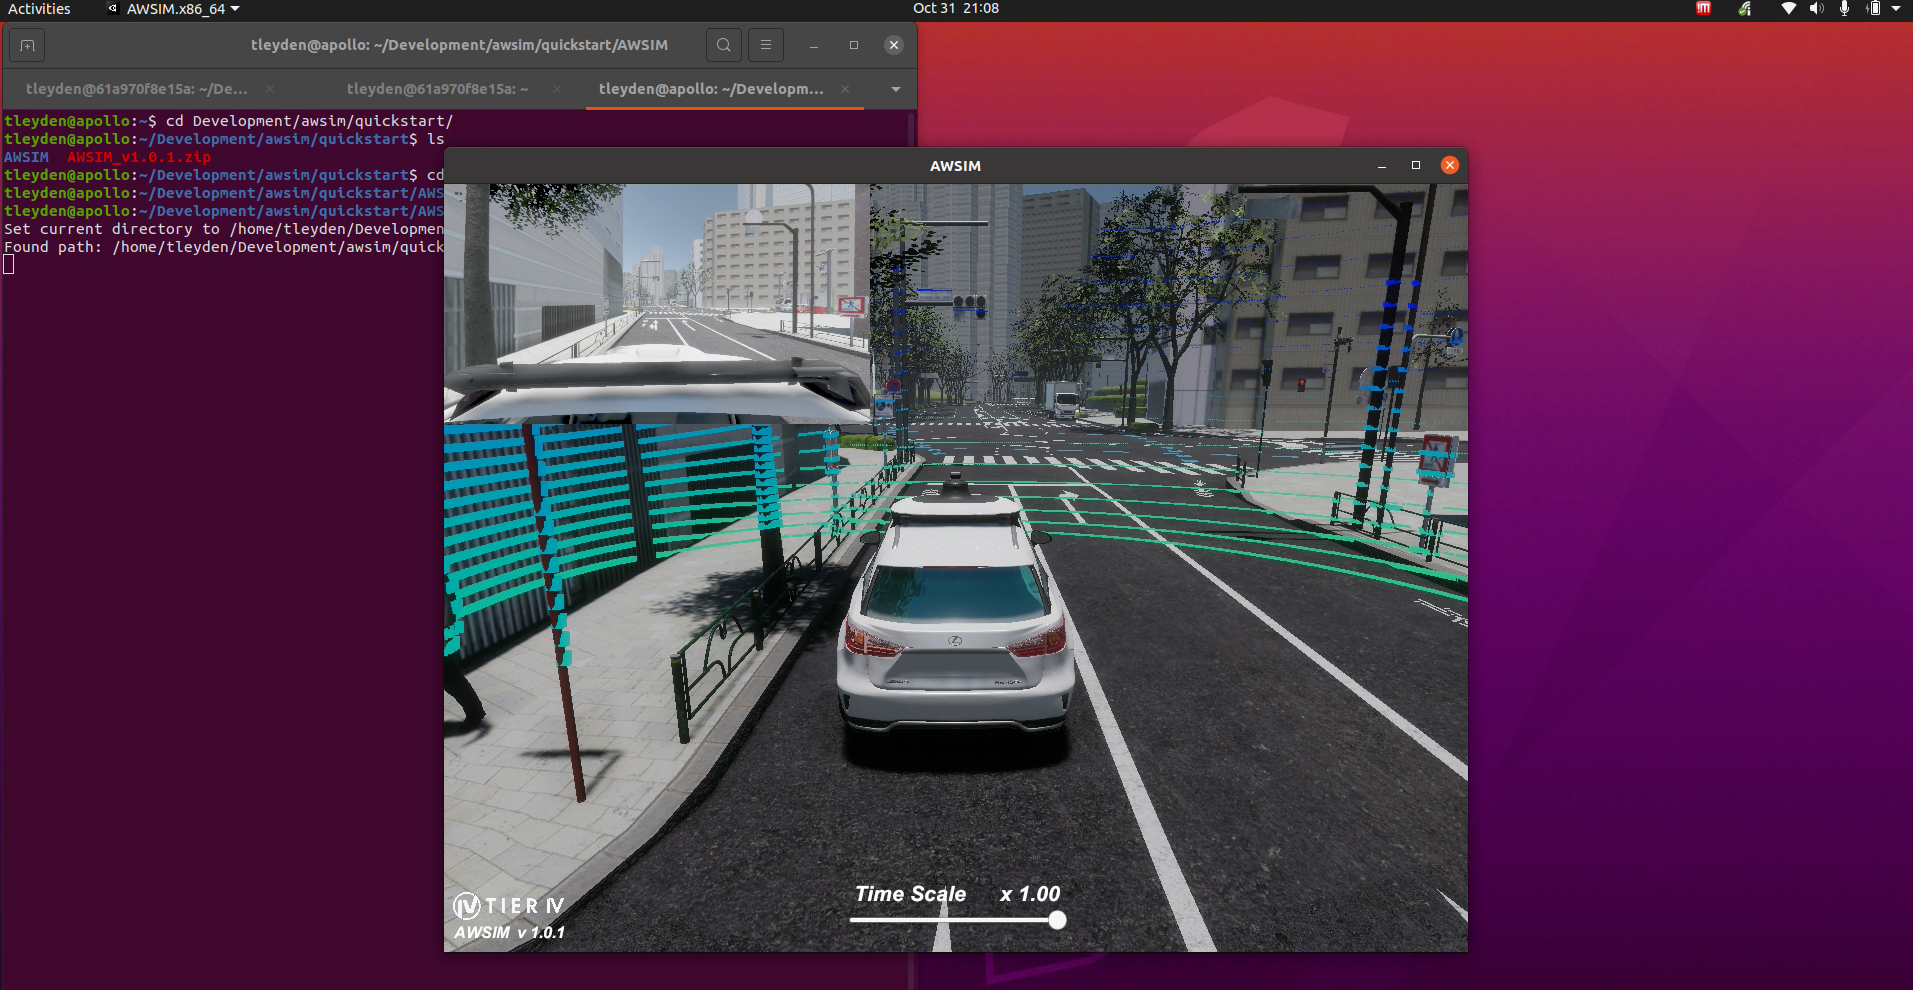
$ ./AWSIM.x86_64 You should see a screen like this:
Launch autoware with downloaded maps
Change the location of the map directory to where you downloaded your nishishinjuku_autoware_map:
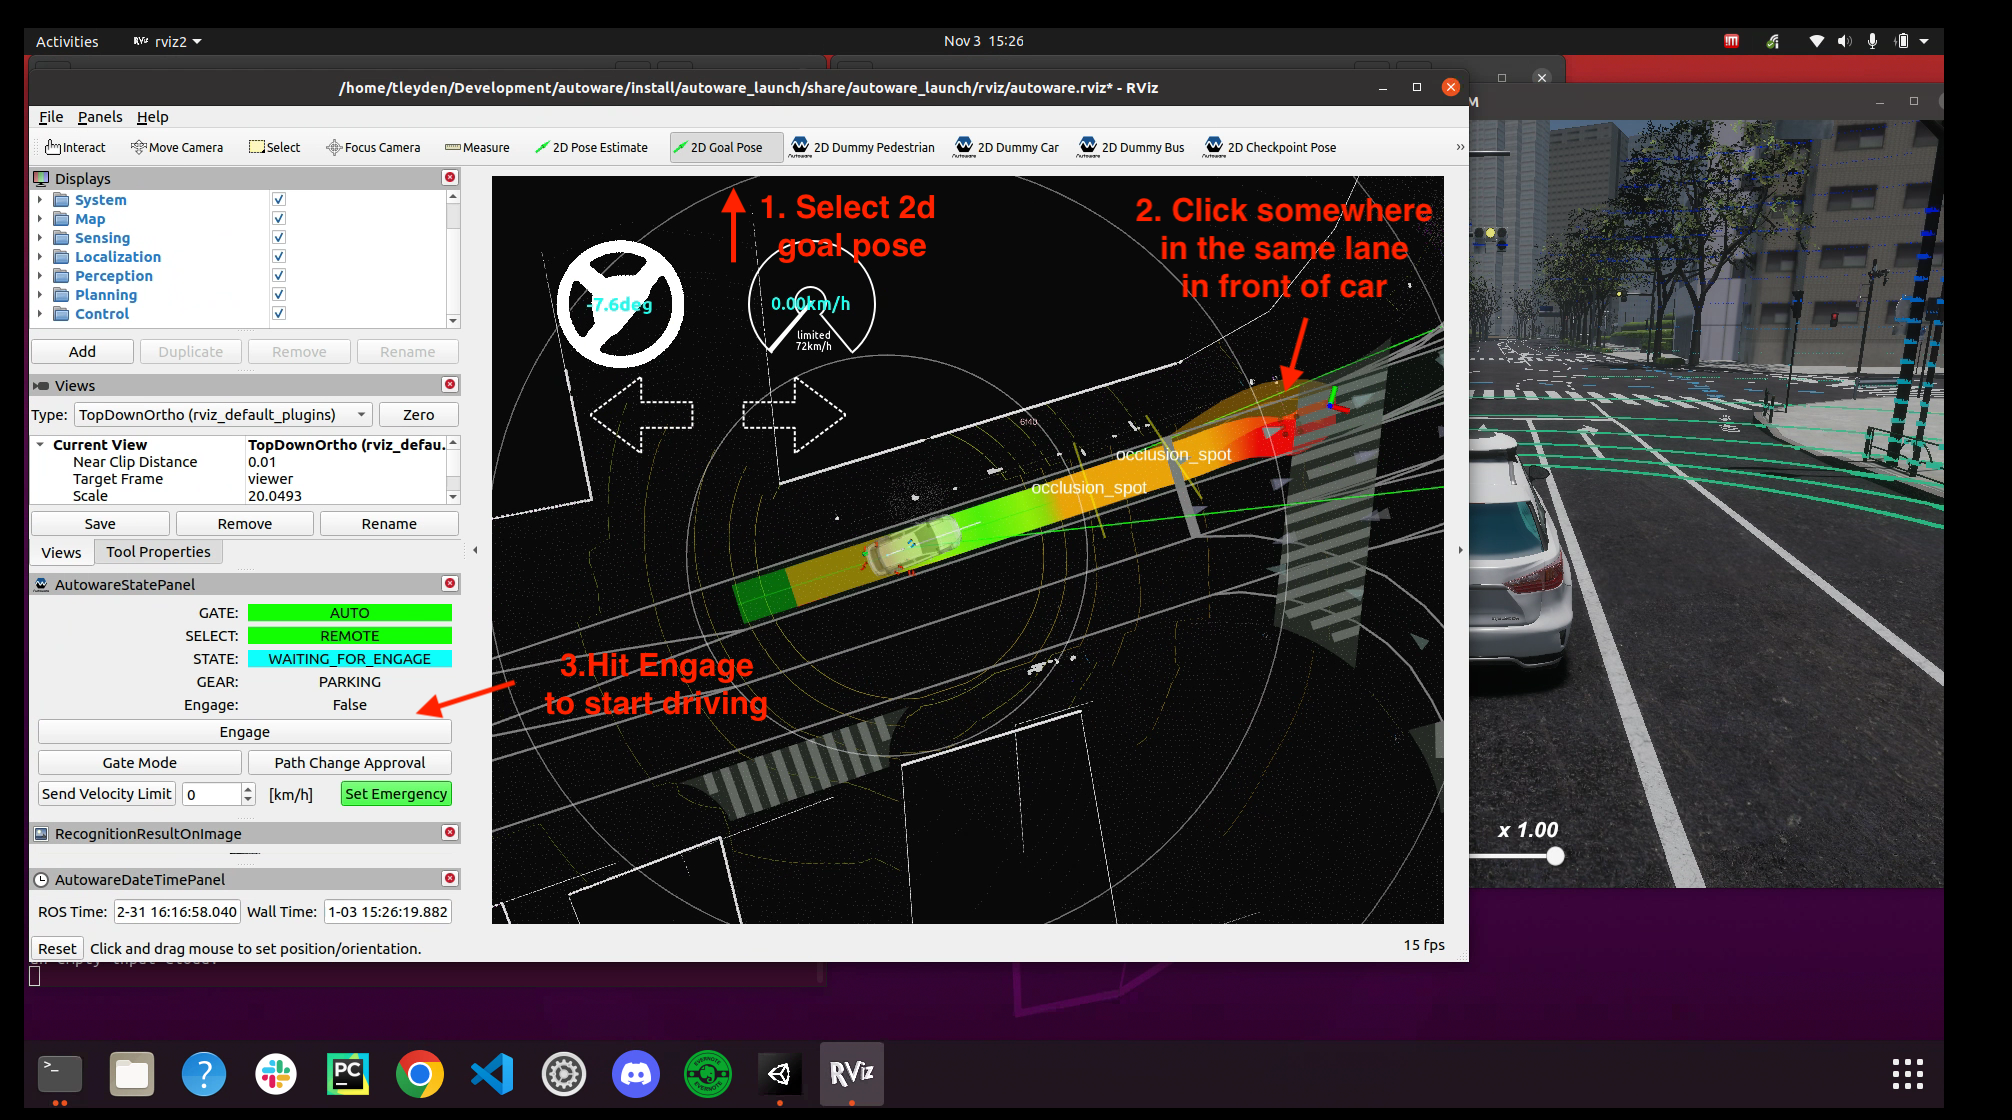
$ ros2 launch autoware_launch e2e_simulator.launch.xml vehicle_model:=sample_vehicle sensor_model:=awsim_sensor_kit map_path:=$HOME/Development/autoware_map/nishishinjuku_autoware_mapFind the ego vehicle by panning around the map until you see the concentric rings.
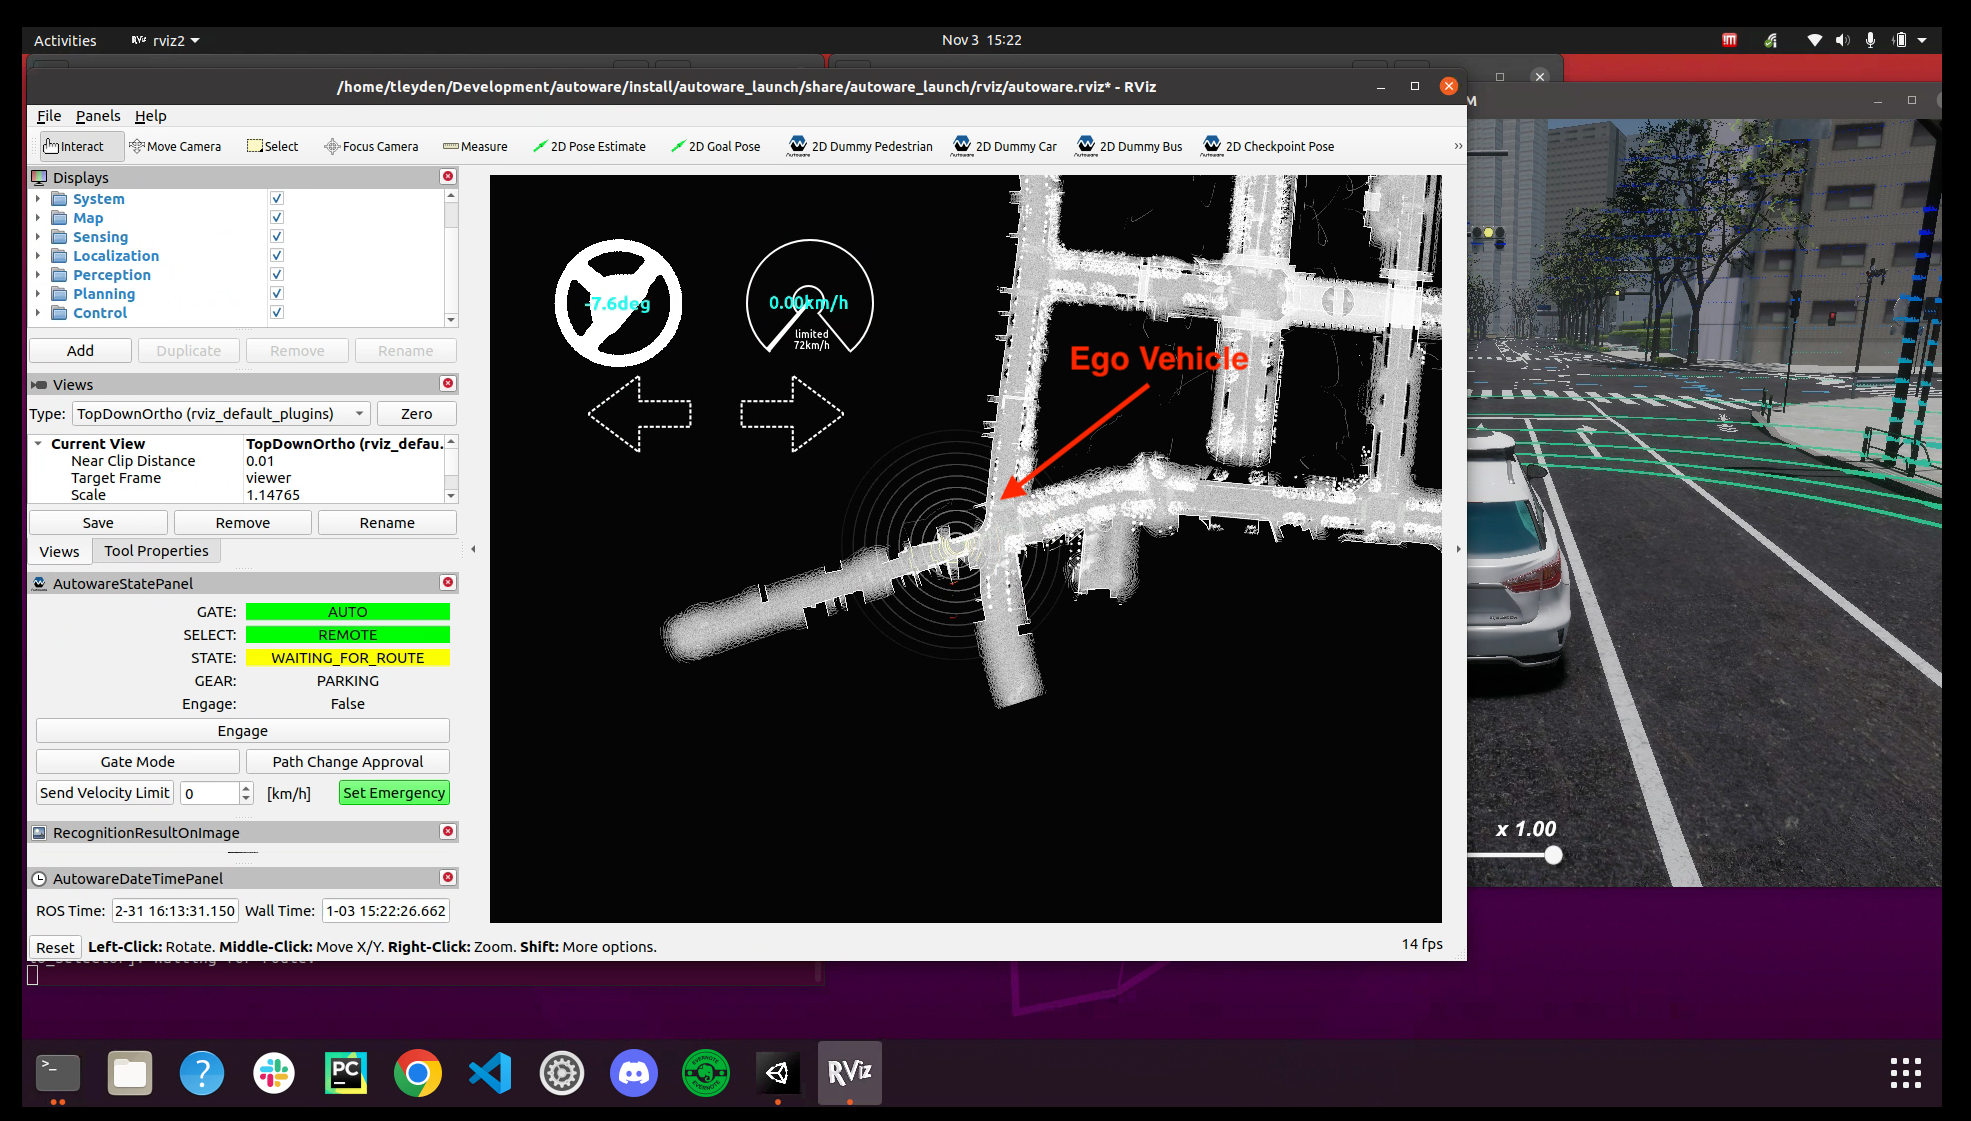
Then zoom in closer and do the following steps. Note that when you drop the 2d goal pose, it seems to help to click and drag in the direction that the car is driving.
You might run into situations where the car gets stuck because it detects obstacles on the path, like this situation:
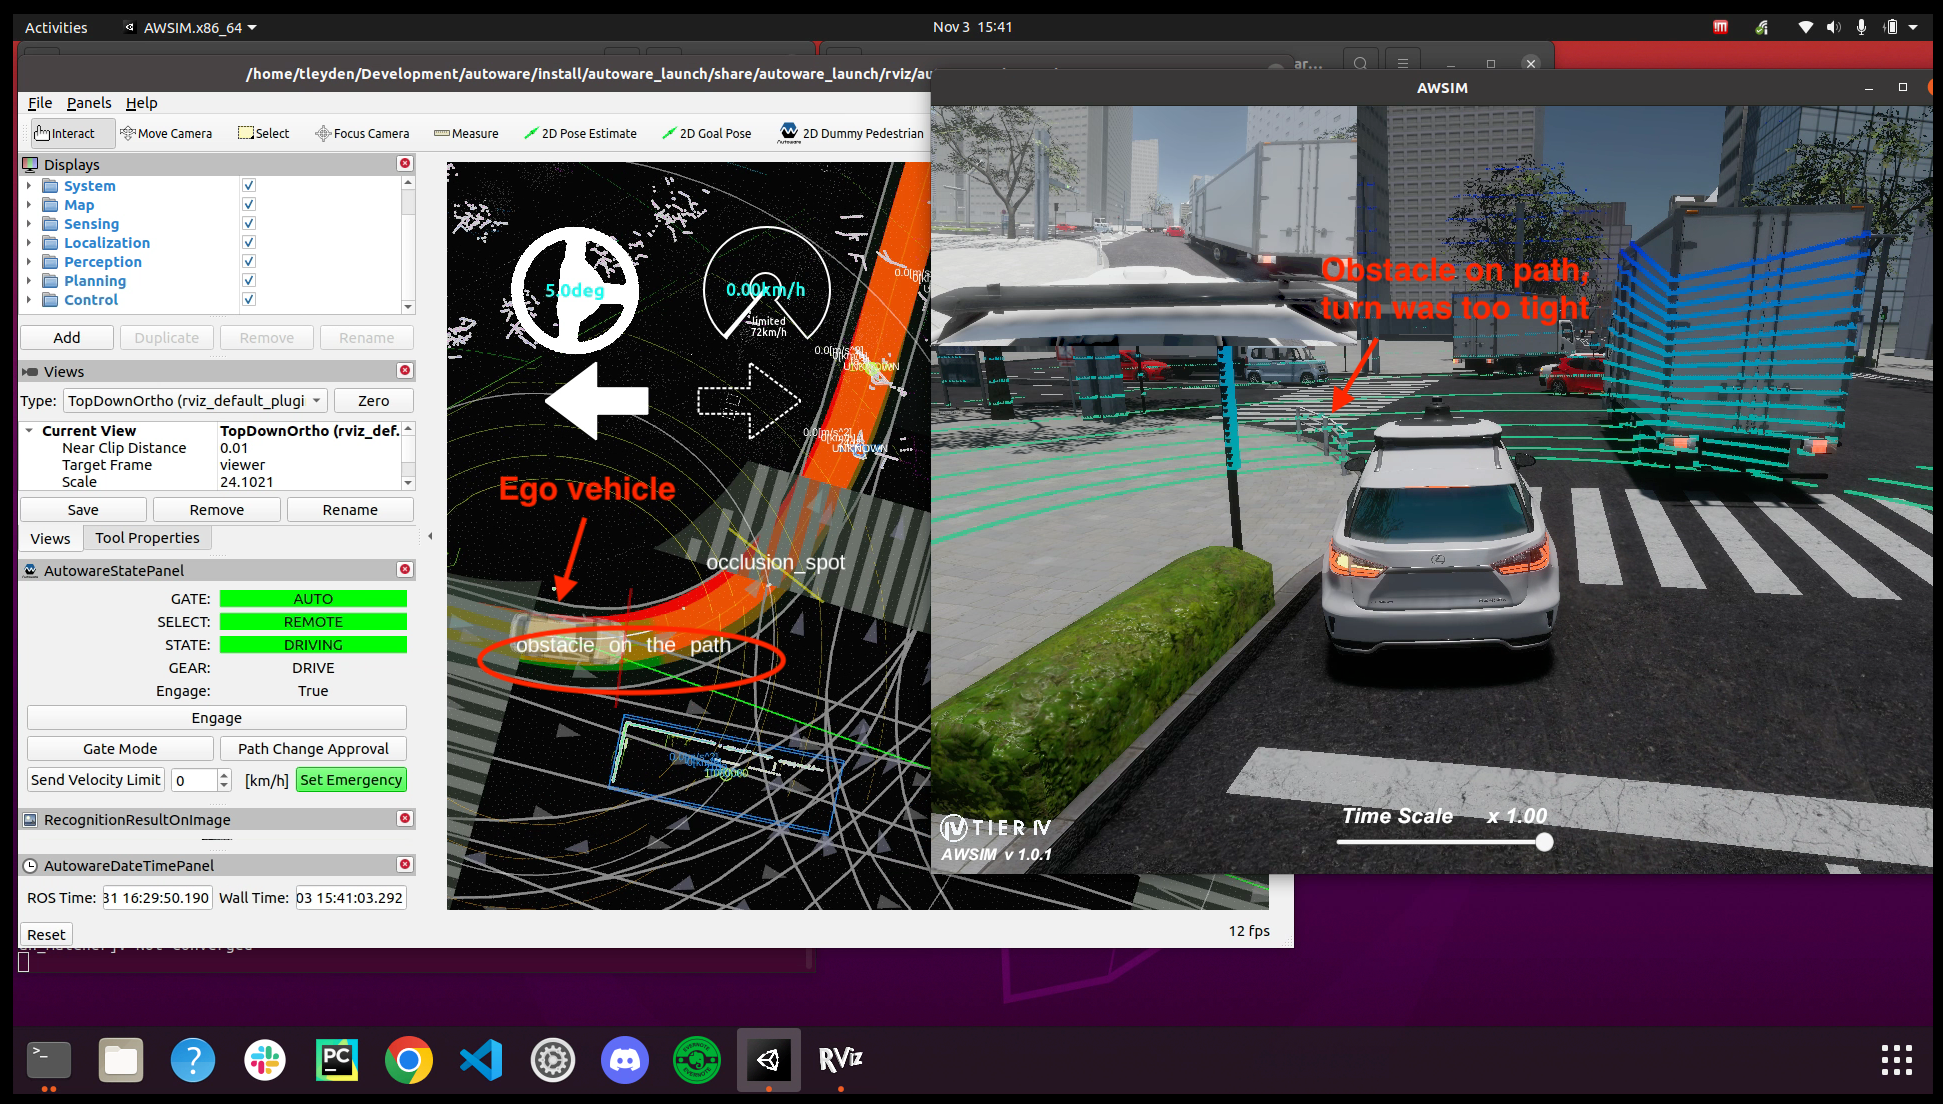
Happy autonomous driving!